Running NiFi Registry behind nginx proxy with SSL/TLS and basic_auth (inside nginx) is a bit tricky. In this article, we will go step-by-step to create this hybrid setup:
- NiFi Registry listening plain HTTP on port 18080 and without authentication
- nginx reverse proxy listening on port 18443 with server-side SSL/TLS certificate and with optional client SSL/TLS authentication
- nginx reverse proxy fallback to basic auth for clients which do not present themselves with valid client SSL/TLS certificate
- Apache NiFi configured to use pre-baked keystore and truststore to authenticate itself using client SSL/TLS against nginx
- NiFi Registry Web UI browser accessible using basic auth
In this setup, NiFi does not authenticate against NiFi Registry (we will still use anonymous access), but the communication is encrypted between NiFi and nginx. By using two-way SSL between NiFi and nginx we can be sure, only NiFi with supplied private key and certificate will be able to talk our NiFi Registry. By using basic auth when no client-side SSL certificate is supplied, we can be sure, only web browsers (users) who know correct user/password are allowed to access NiFi Registry web UI.
We will prepare certificates and truststores in a way, that makes nginx sure about authenticity of NiFi client and vice-versa (using own CA, but you can buy commercial certificates if you want).
Architecture
The big picture of what are we trying to setup is depicted in the following figure. All communication with outside world is SSL/TLS enabled. Link between nginx and NiFi Registry is plain HTTP - make sure this is only on internal network or over loopback interface.
 |
|---|
| NiFi Registry with nginx reverse proxy SSL and basic auth architecture |
Requirements
We will use Ubuntu as base box.
- install openssl:
sudo apt-get install -y openssl - install nginx:
sudo apt install nginx - optionally, if you want to try NiFi Registry inside Docker. Install docker-ce
Prepare SSL certification authority, keys and certificates
Prepare separate directory for our own CA:
mkdir ca
cd ca
Create Certificate Authority
Using the CA.pl, which should be located
under /usr/lib/ssl/misc/CA.pl in Ubuntu, we first create our new Certificate Authority:
/usr/lib/ssl/misc/CA.pl -newca
In interactive session, we fill in the details:
CA certificate filename (or enter to create) ENTER

Making CA certificate ...
====
openssl req  -new -keyout ./demoCA/private/cakey.pem -out ./demoCA/careq.pem
Generating a 2048 bit RSA private key
....................................................................................................................................................................................................+++
............................................+++
writing new private key to './demoCA/private/cakey.pem'
Enter PEM pass phrase: password
Verifying - Enter PEM pass phrase: password
-----
You are about to be asked to enter information that will be incorporated
into your certificate request.
What you are about to enter is what is called a Distinguished Name or a DN.
There are quite a few fields but you can leave some blank
For some fields there will be a default value,
If you enter '.', the field will be left blank.
-----
Country Name (2 letter code) [AU]: SK
State or Province Name (full name) [Some-State]:Bratislava
Locality Name (eg, city) []:
Organization Name (eg, company) [Internet Widgits Pty Ltd]:
Organizational Unit Name (eg, section) []:
Common Name (e.g. server FQDN or YOUR name) []:michalklempa.com
Email Address []:

Please enter the following 'extra' attributes
to be sent with your certificate request
A challenge password []:
An optional company name []:
==> 0
====
====
openssl ca  -create_serial -out ./demoCA/cacert.pem -days 1095 -batch -keyfile ./demoCA/private/cakey.pem -selfsign -extensions v3_ca -infiles ./demoCA/careq.pem
Using configuration from /usr/lib/ssl/openssl.cnf
Enter pass phrase for ./demoCA/private/cakey.pem:
Can't open ./demoCA/index.txt.attr for reading, No such file or directory
139693117768128:error:02001002:system library:fopen:No such file or directory:../crypto/bio/bss_file.c:74:fopen('./demoCA/index.txt.attr','r')
139693117768128:error:2006D080:BIO routines:BIO_new_file:no such file:../crypto/bio/bss_file.c:81:
Check that the request matches the signature
Signature ok
Certificate Details:
        Serial Number:
            93:21:5a:ca:85:8c:41:d3
        Validity
            Not Before: Apr 10 19:20:00 2019 GMT
            Not After : Apr  9 19:20:00 2022 GMT
        Subject:
            countryName               = SK
            stateOrProvinceName       = Bratislava
            organizationName          = Internet Widgits Pty Ltd
            commonName                = michalklempa.com
        X509v3 extensions:
            X509v3 Subject Key Identifier:
                7E:E3:07:5B:42:67:FD:BC:33:30:F3:42:76:E5:B6:47:5A:07:92:9E
            X509v3 Authority Key Identifier:
                keyid:7E:E3:07:5B:42:67:FD:BC:33:30:F3:42:76:E5:B6:47:5A:07:92:9E

            X509v3 Basic Constraints: critical
                CA:TRUE
Certificate is to be certified until Apr  9 19:20:00 2022 GMT (1095 days)

Write out database with 1 new entries
Data Base Updated
==> 0
====
CA certificate is in ./demoCA/cacert.pem
Create client and server keys and certificates
Given the CA we just created, we create and sign two certificates.
- Client key and certificate for client SSL. This one will be later supplied into the NiFi instance.
- Server key and certificate for nginx. This one will be supplied to nginx.
Process of creating both is the same.
Client key and certificate
/usr/lib/ssl/misc/CA.pl -newreq-nodes
Our reponses to interactive promtps:
====
openssl req  -new -nodes -keyout newkey.pem -out newreq.pem -days 365
Generating a 2048 bit RSA private key
..........................+++
............................+++
writing new private key to 'newkey.pem'
-----
You are about to be asked to enter information that will be incorporated
into your certificate request.
What you are about to enter is what is called a Distinguished Name or a DN.
There are quite a few fields but you can leave some blank
For some fields there will be a default value,
If you enter '.', the field will be left blank.
-----
Country Name (2 letter code) [AU]: SK
State or Province Name (full name) [Some-State]: Bratislava
Locality Name (eg, city) []:
Organization Name (eg, company) [Internet Widgits Pty Ltd]:
Organizational Unit Name (eg, section) []:
Common Name (e.g. server FQDN or YOUR name) []:client
Email Address []:

Please enter the following 'extra' attributes
to be sent with your certificate request
A challenge password []:
An optional company name []:
==> 0
====
Request is in newreq.pem, private key is in newkey.pem
And sign the certificate.
/usr/lib/ssl/misc/CA.pl -sign
Respond to interactive queries:
====
openssl ca  -policy policy_anything -out newcert.pem -infiles newreq.pem
Using configuration from /usr/lib/ssl/openssl.cnf
Enter pass phrase for ./demoCA/private/cakey.pem: password
Check that the request matches the signature
Signature ok
Certificate Details:
        Serial Number:
            93:21:5a:ca:85:8c:41:d4
        Validity
            Not Before: Apr 11 19:27:20 2019 GMT
            Not After : Apr 10 19:27:20 2020 GMT
        Subject:
            countryName               = SK
            stateOrProvinceName       = Bratislava
            organizationName          = Internet Widgits Pty Ltd
            commonName                = client
        X509v3 extensions:
            X509v3 Basic Constraints:
                CA:FALSE
            Netscape Comment:
                OpenSSL Generated Certificate
            X509v3 Subject Key Identifier:
                AB:20:8A:C9:C5:37:96:49:3D:3F:43:4D:DC:43:8B:DA:FE:C9:86:EE
            X509v3 Authority Key Identifier:
                keyid:7E:E3:07:5B:42:67:FD:BC:33:30:F3:42:76:E5:B6:47:5A:07:92:9E

Certificate is to be certified until Apr 10 19:27:20 2020 GMT (365 days)
Sign the certificate? [y/n]:y


1 out of 1 certificate requests certified, commit? [y/n]y
Write out database with 1 new entries
Data Base Updated
==> 0
====
Signed certificate is in newcert.pem
As this is the client key and certificate, let us pack it into one PKCS#12 file.
/usr/lib/ssl/misc/CA.pl -pkcs12
====
openssl pkcs12 -in newcert.pem -inkey newkey.pem -certfile ./demoCA/cacert.pem -out newcert.p12 -export -name "My Certificate"
Enter Export Password: password
Verifying - Enter Export Password: password
==> 0
====
PKCS #12 file is in newcert.p12
Now rename our files, so they are not overwritten in later steps.
mv newcert.p12 client_keystore.p12
mv newcert.pem client_cert.pem
mv newkey.pem client_key.pem
mv newreq.pem client_req.pem
Server key and certificate
The process is the same as with the client certificate.
Only the common name will be set to server and we do not need to pack key and certificate into PKCS#12 as this format not accepted by nginx, either.
/usr/lib/ssl/misc/CA.pl -newreq-nodes
...
Common Name (e.g. server FQDN or YOUR name) []:server
...
And sign:
/usr/lib/ssl/misc/CA.pl -sign
Rename files:
mv newcert.pem server_cert.pem
mv newkey.pem server_key.pem
mv newreq.pem server_req.pem
Prepare Java truststore (NiFi client)
To create a Java truststore with our CA cert, we use keytool:
keytool -noprompt -importcert -storetype pkcs12 -keystore client_truststore.p12 -storepass changeit -file demoCA/cacert.pem -alias cacert
Our ./ca directory should contain these files:
client_cert.pem
client_key.pem
client_keystore.p12
client_req.pem
client_truststore.p12
demoCA/
server_cert.pem
server_key.pem
server_req.pem
We have prepared our cryptographic pre-requisites.
Setup NiFi Registry
You can choose to run Registry either standalone on using Docker.
NiFi Registry standalone
Download NiFi Registry, unpack.
To make link between nginx and NiFi Registry secure, configure Registry to listen only on loopback address.
Modify ./conf/nifi-registry.properties:
nifi.registry.web.http.host=127.0.0.1
And run:
./bin/nifi-registry.sh start
Verify that NiFi Registry is running, by reading logs in ./logs/nifi-registry-app.log.
NiFi Registry inside Docker
Just run:
docker run --name nifi-registry \
        -p 18080:18080 \
        -e 'NIFI_REGISTRY_WEB_HTTP_HOST=127.0.0.1' \
        -d \
        michalklempa/nifi-registry:latest
And check logs:
docker logs -f nifi-registry
Browse to http://127.0.0.1:18080/nifi-registry. Create a bucket in NiFi Registry, as demonstrated in first two minutes of Getting Started with Apache NiFi Registry.
Setup nginx
Put server_cert.pem, server_key.pem and client_cert.pem to /etc/nginx/. Then, the /etc/nginx/conf.d/default.conf should look like:
server {
  listen 18443 ssl;

  root /usr/share/nginx/html;

  index index.html;

  server_name _;

  ssl_certificate /etc/nginx/server_cert.pem;
  ssl_certificate_key /etc/nginx/server_key.pem;

  ssl_client_certificate /etc/nginx/client_cert.pem;
  ssl_verify_client optional;

  ssl_protocols TLSv1 TLSv1.1 TLSv1.2;
  # enables server-side protection from BEAST attacks
  ssl_prefer_server_ciphers on;

  # Disabled insecure ciphers suite. For example, MD5, DES, RC4, PSK
  ssl_ciphers "ECDHE-RSA-AES256-GCM-SHA384:ECDHE-RSA-AES128-GCM-SHA256:DHE-RSA-AES256-GCM-SHA384:DHE-RSA-AES128-GCM-SHA256:ECDHE-RSA-AES256-SHA384:ECDHE-RSA-AES128-SHA256:ECDHE-RSA-AES256-SHA:ECDHE-RSA-AES128-SHA:DHE-RSA-AES256-SHA256:DHE-RSA-AES128-SHA256:DHE-RSA-AES256-SHA:DHE-RSA-AES128-SHA:ECDHE-RSA-DES-CBC3-SHA:EDH-RSA-DES-CBC3-SHA:AES256-GCM-SHA384:AES128-GCM-SHA256:AES256-SHA256:AES128-SHA256:AES256-SHA:AES128-SHA:DES-CBC3-SHA:HIGH:!aNULL:!eNULL:!EXPORT:!DES:!MD5:!PSK:!RC4:@STRENGTH";

  # -!MEDIUM:exclude encryption cipher suites using 128 bit encryption.
  # -!LOW:   exclude encryption cipher suites using 64 or 56 bit encryption algorithms
  # -!EXPORT: exclude export encryption algorithms including 40 and 56 bits algorithms.
  # -!aNULL:  exclude the cipher suites offering no authentication. This is currently the anonymous DH algorithms and anonymous ECDH algorithms.
  # These cipher suites are vulnerable to a "man in the middle" attack and so their use is normally discouraged.
  # -!eNULL:exclude the "NULL" ciphers that is those offering no encryption.
  # Because these offer no encryption at all and are a security risk they are disabled unless explicitly included.
  # @STRENGTH:sort the current cipher list in order of encryption algorithm key length.

  location / {
    if ($ssl_client_verify = SUCCESS) {
      set $auth_basic off;
    }
    if ($ssl_client_verify != SUCCESS) {
      set $auth_basic "Restricted Content";
    }

    auth_basic $auth_basic;
    auth_basic_user_file /etc/nginx/htpasswd;

    proxy_pass    http://localhost:18080;
    proxy_set_header   Host                 $host;
    proxy_set_header   X-Real-IP            $remote_addr;
    proxy_set_header   X-Forwarded-For      $proxy_add_x_forwarded_for;
    proxy_set_header   X-Forwarded-Proto    $scheme;
    proxy_set_header   X-Forwarded-User     $remote_user;
    proxy_set_header   Authorization        "";
    proxy_set_header   X-ProxyScheme        $scheme;
    proxy_set_header   X-ProxyHost          $hostname;
    proxy_set_header   X-ProxyPort          $server_port;
    proxy_set_header   X-ProxyContextPath   /;
  }
}
The $ssl_client_verify variable is filled directly by nginx (see ssl_verify_client).
If-else with basic auth is a trick from Andreas Klőber answer on stackoverflow.
Finally, the SSL-related option tweaking is from NginX Secure Configuration Guide by OWASP.
We have conditional basic auth, if the client presents himself with SSL certificate, and it is valid when compared to client_cert.pem,
nginx accept the request as $ssl_client_verify = SUCCESS and we do not require basic auth.
As there is exactly one certificate which can satisfy this requirement, we can be sure, that only entity to which we provide the client_key.pem
will be able to pass this test. This will be our NiFi client instance.
Otherwise, users can use standard basic auth - the htpasswd file.
To create htpasswd file we can use:
openssl passwd -apr1
Lets use password: password for this demonstration.
Create file /etc/nginx/htpasswd with contents as described in nginx auth_basic module:
admin:$apr1$jkiH6uYr$qfmMZf6OCSIEA42IRme9I/
Start nginx:
nginx
Try to browse to https://127.0.0.1:18443/nifi-registry/, you should be able to authentice yourself using admin/password.
Setup NiFi
To enable NiFi talking to nginx with client SSL certificate, we provide
client_keystore.p12 together with the password.
To let NiFi trust server certificate, we provide client_truststore.p12, which contains
only our root CA certificate.
Following nifi.properties need to be altered:
nifi.security.keystore=./conf/client_keystore.p12
nifi.security.keystoreType=pkcs12
nifi.security.keystorePasswd=password
nifi.security.keyPasswd=password
nifi.security.truststore=./conf/client_truststore.p12
nifi.security.truststoreType=pkcs12
nifi.security.truststorePasswd=changeit
Start NiFi as usual:
./bin/nifi.sh start
Adding Registry to Controller Services
We can add the NiFi Registry to Controller services either using NiFi’s UI, as is demonstrated at Getting Started with Apache NiFi Registry 1:50: Or we can use the NiFi REST API:
curl -v -X POST 'http://127.0.0.1:8080/nifi-api/controller/registry-clients' \
    -H 'Content-Type: application/json' \
    --data '{"revision":{"clientId":"curl","version":0},"disconnectedNodeAcknowledged":false,"component":{"name":"https://127.0.0.1:18443","uri":"https://127.0.0.1:18443","description":"NiFi Registry behind nginx"}}'
Notice the https:// scheme in our URI, this connection will be handled by nginx on the server side.
Do not use the port :18080 (although NiFi Registry listens on that one).
Try to create a Process Group and commit version to NiFi Registry.
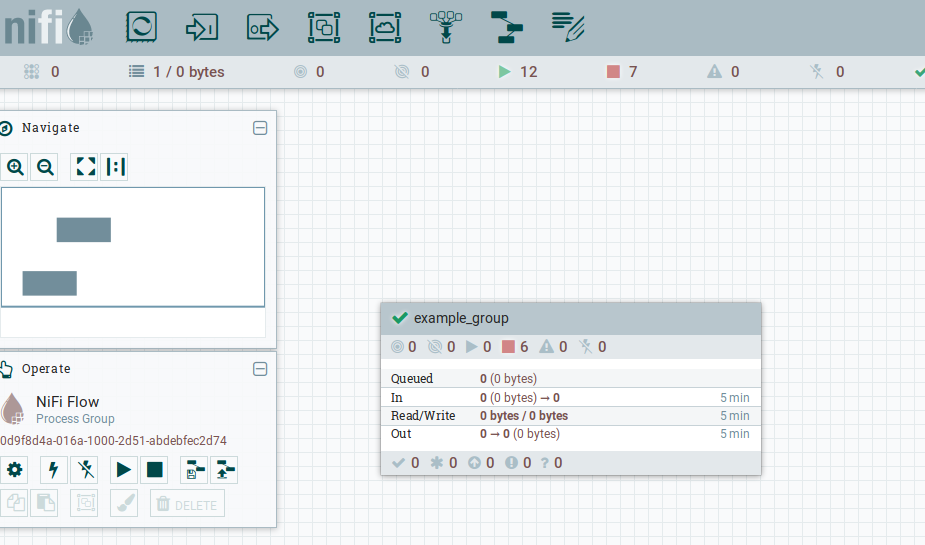 |
|---|
| NiFi with example Process Group commited to Registry |
Conclusion
All the configuration files and certificates are available in github repository.